
برتر فایل
مجموعه فایل های آموزش مقدماتی تا پیشرفته نرم افزار کتیا (CATIA) و مجموعه کتب, جزوات, پروژه و مقالات تخصصی مهندسی مکانیک
برتر فایل
مجموعه فایل های آموزش مقدماتی تا پیشرفته نرم افزار کتیا (CATIA) و مجموعه کتب, جزوات, پروژه و مقالات تخصصی مهندسی مکانیکآموزش ان ایکس، کتاب NX7 جهت طراحی مهندسی (NX7 for Engineering Design)
NX یا UniGraphics که به UG معروف است، یک نرم افزار فوق العاده پیشرفته و توانمند در بحث CAID/CAD/CAE/CAM/PLM بوده که توسط شرکت معتبر SIEMENS توسعه یافته است. این نرم افزار بسیار پیشرفته به عنوان اولین و قوی ترین نرم افزار طراحی مهندسی دنیا شناخته می شود و نرم افزارهای دیگر به تقلید از آن ساخته شدند (از جمله نرم افزار کتیا).
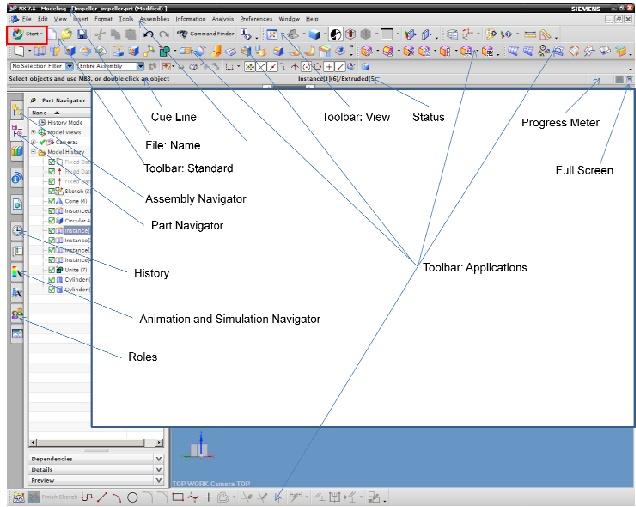
کتاب NX7 جهت طراحی مهندسی (NX7 for Engineering Design)، یکی از کتاب های مفید و کاربردی در زمینه آموزش نرم افزار قدرتمند NX7 می باشد. این کتاب مشتمل بر 234 صفحه، به زبان انگلیسی روان، تایپ شده، به همراه کلی تصاویر رنگی، با فرمت PDF، به ترتیب زیر گردآوری شده است:
CHAPTER 1 - INTRODUCTION
PRODUCT REALIZATION PROCESS
BRIEF HISTORY OF CAD/CAM DEVELOPMENT
DEFINITION OF CAD/CAM/CAE
Computer Aided Design – CAD
Computer Aided Manufacturing – CAM
Computer Aided Engineering – CAE
SCOPE OF THIS TUTORIAL
CHAPTER 2 - GETTING STARTED
STARTING NX7 SESSION AND OPENING FILES
Open NX7 Session
Open a New File
Open a Part File
PRINTING, SAVING AND CLOSING PART FILES
Print a NX7 Image
Save Part Files
Close Part Files
Exit an NX7 Session
Simultaneously Saving All Parts and Exiting
NX7 INTERFACE
Mouse Functionality
NX7 Gateway
Geometry Selection
User Preferences
Applications
COORDINATE SYSTEMS
Absolute Coordinate System
Work Coordinate System
Move the WCS
USING LAYERS
Layer Control
Commands in Layers
IMPORTANT COMMANDS/DIALOGS
CHAPTER 3 - FORM FEATURES
OVERVIEW
TYPES OF FEATURES
PRIMITIVES
Model a Block
Model a Shaft
REFERENCE FEATURES
Datum Plane
Datum Axis
SWEPT FEATURES
Extruded Body
REMOVE FEATURES
EXERCISE - MODEL A WASHER
CHAPTER 4 – FEATURE OPERATIONS
OVERVIEW
TYPES OF FEATURE OPERATIONS
FEATURE OPERATIONS ON MODELS
Model a Hexagonal Screw
Model an L-Bar
Model a Hexagonal Nut
Model a Rack with Instances
EXERCISE - MODEL A CIRCULAR BASE
CHAPTER 5 – DRAFTING
OVERVIEW
DRAFTING OF MODELS
Drafting
Dimensioning
Sectional View
Drafting and Dimensioning of an Impeller hexagonal bolt
EXERCISE - DRAFTING AND DIMENSIONING OF A CIRCULAR BASE
CHAPTER 6 – SKETCHING
OVERVIEW
SKETCHING FOR CREATING MODELS
Model an Arbor Press Base
Model an Impeller Lower Casing
Model an Impeller
EXERCISES
CHAPTER 7 – FREEFORM FEATURE
OVERVIEW
Creating Freeform Features from Points
Creating Freeform Features from Section Strings
Creating Freeform Features from Faces
FREEFORM FEATURE MODELING
Modeling with points
Modeling with a point cloud
Modeling with curves
Modeling with curves and faces
EXERCISE - MODEL A MOUSE
CHAPTER 8 – ASSEMBLY MODELING
OVERVIEW
TERMINOLOGIES
ASSEMBLY MODELS
Top-Down Approach
Bottom-Up Approach
Mixing and Matching 146
ASSEMBLY NAVIGATOR
MATING CONDITIONS
IMPELLER ASSEMBLY
EXPLODED VIEW OF IMPELLER ASSEMBLY
EXERCISE - ARBOR PRESS ASSEMBLY
CHAPTER 9 - FINITE ELEMENT ANALYSIS
INTRODUCTION
Element shapes and nodes
Structure Module
Simulation Navigator
SOLUTION CREATION
Material Properties
Mesh
Boundary Conditions
Loads
RESULT AND SIMULATION
Solving the Scenario
FEA Results
Simulation and Animation
EXERCISE - ARBORPRESS L-BAR
CHAPTER 10 - MANUFACTURING
GETTING STARTED WITH MANUFACTURING MODULE
Creation of a Blank
Setting Machining Environment
Operation Navigator
Machine Coordinate System (MCS)
Geometry Definition
CREATING OPERATION AND PARAMETER SETTING
Creating a new Operation
Tool Creation and Selection
Tool Path Settings
Step Over and Scallop Height:
Depth per cut
Cutting Parameters
Avoidance
Speeds and Feeds
PROGRAM GENERATION AND VERIFICATION
Generating Program
Tool Path Display
Tool Path Simulation
Gouge Check
OPERATION METHODS
Roughing
Semi-Finishing
Finishing Profile
Finishing Contour Surface
Flooring
POST PROCESSING
Creating CLSF
Post-Processing
* توجه: کاربران نگران زبان انگلیسی کتاب نباشند. حتی کاربرانی که سر انگشتی زبان انگلیسی یاد دارند قادر خواهند بود از این کتاب بهره کافی را ببرند. لازم به ذکر است که آموزش در کتاب NX7 جهت طراحی مهندسی (NX7 for Engineering Design) به صورت قدم به قدم (Step to Step) همراه با تصاویر واضح و رنگی می باشد.

جهت دانلود کتاب NX7 جهت طراحی مهندسی (NX7 for Engineering Design) بر لینک زیر کلیک نمایید:
آموزش ان ایکس، کتاب NX7 جهت طراحی مهندسی (NX7 for Engineering Design)
دانلود نرم افزار طراحی و مدل سازی قطعات متحرک Camnetics Suite 2016
شرکت Camnetics که تولید کننده نرم افزار های مدل سازی قطعات متحرک برای مهندسان و طراحان است جدید ترین ورژن از مجموعه Camnetics Suite را منتشر نموده است. این مجموعه در واقع به عنوان پلاگین برای اکثر نرم افزارهای CAD از جمله SolidWorks ,Solid Edge و AutoDesk Inventor می باشد که ابزار و ویژگی های پیشرفته ای را برای طراحان ایجاد می نماید تا بتوانند بدون دانش تخصصی قطعات خود را طراحی نموده و خصوصیات حرکتی و کنترلی قطعات را تعیین نمایند. همچنین این نرم افزار قابلیت اتصال به نرم افزار اکسل را نیز دارد.

این مجموعه شامل سه پلاگین GearTrax ،GearTeq و CamTrax است:
- با پلاگین GearTrax می توان انواع چرخ دنده ها را با ویژگی هایشان طراحی نمود.
- با استفاده از GearTeq قطعات متحرک را طراحی نموده و می توان آن ها را اسمبلی (مونتاژ) نمود.
- با پلاگین CamTrax می توان انواع میله های سربی و cam ها را طراحی نمود.
از قابلیت های کلیدی نرم افزار Camnetics Suite 2016 می توان به موارد زیر اشاره نمود:
- متصل نمودن قطعات به یکدیگر و استفاده از آن ها به صورت گروهی
- قابلیت قفل کردن قطعات برای جلوگیری از تغییرات ناخواسته
- مشاهده تغییرات به صورت هندسی بر روی صفحه نمایش
- تست شعاع چرخ بلبرینگ و...
در این پکیج کاربر قادر خواهد بود موارد زیر را دانلود نماید:
 دانلود نسخه ی 32 بیتی GearTeq برای Solidworks دانلود نسخه ی 32 بیتی GearTrax برای Solidworks دانلود نسخه ی 64 بیتی CamTra برای solidEdge
 دانلود کرک (به تنهایی)
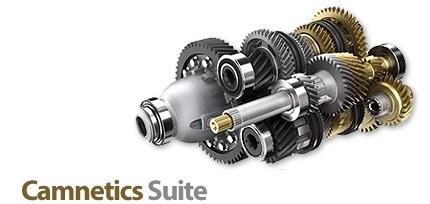
جهت دانلود نرم افزار طراحی و مدل سازی قطعات متحرک Camnetics Suite 2016 بر لینک زیر کلیک نمایید:
دانلود نرم افزار طراحی و مدل سازی قطعات متحرک Camnetics Suite 2016
کتاب آموزش سالیدورکس با رویکرد مبتنی بر پروژه (SolidWorks A Project Based Approach)
کتاب آموزش سالیدورکس با رویکرد مبتنی بر پروژه (SolidWorks A Project Based Approach)، یکی از کتاب های مرجع، مفید و کاربردی در زمینه آموزش طراحی با نرم افزار سالیدورکس می باشد. این کتاب مشتمل بر 375 صفحه، به زبان انگلیسی روان، تایپ شده، به همراه کلی تصاویر رنگی، با فرمت PDF، به ترتیب زیر گردآوری شده است:
Chapter 1: Getting Started
Introduction
Starting SolidWorks
User Interface
Tools and Toolbars
File Types
Backing Up Files
Chapter 2: Basic Sketching
Line/Arc Sketching
Fully Defining the Handle
Extruding the Handle
Editing Your Work
Chapter 3: Custom Templates
Customizing Your Templates
Drawing Templates
Toolbox Customization
Copy Settings Wizard
Saving Your Settings
Restoring Your Settings
Chapter 4: LEGO Minions, Part 1—Designing
2 × 2 Block
Square Base Extrusion
Round Extrusions
Edit a Feature
Re-Ordering Items in the Feature Tree
Rollback Bar
Shell
Chamfer
Interior Features
Wheel Hub
Tire
Design Configurations—Parametric Modeling
Naming Dimensions
Configuring External Dimensions
Selecting a Configuration
Repairing Issues
Creating a New View Orientation
Configuring Internal Features
Configuring Features
Chapter 5: Design Tables with Excel
Standard
Creating the Design Configurations
Bell Type
Adding a Feature to the Table
Chapter 6: Heat Sink
Creating Ribs
Extra Practice
Chapter 7: LEGO Minions, Part 2—Assemblies
Assemblies
Inserting a Component
Adding Mates
Creating a Subassembly within an Assembly
Creating Your Minions
Copying an Existing Assembly Component
Copy with Mates
Adding a Part through File Explorer
Mirror Assembly Components
Assembly Linear Pattern
Interference Detection
Open Part
Inserting a Subassembly
Assembly Configurations
Pack and Go
Exploded Assembly
Chapter 8: LEGO Minions, Part 3—Drawing
Exploded View
Drawing View Property Manager
Feature Manager Design Tree
Restoring Broken Title Block Link
Standard Three View
Selecting a Scale
Deleting a View
Showing Hidden Lines
Cross Section
Inserting Solid Creation Dimensions
Model Items Property Manager
Adding Center Mark/Line
Adding Text to a Dimension
Chamfer Dimension
Dimension Property Manager
Projected View
Inserting Dimensions into One View
Smart Dimensioning a Drawing
Broken-Out Section
Detail View
Aligned Section View
Dimensioning to a Virtual Sharp
Creating Drawing Views Using Model View
BOM - Bill of Materials
Showing Part Configurations
Save as a PDF
Chapter 9: LEGO Minions, Part 4—Revisions
Chapter 10: Bar Puller
Shank
Create Remaining Parts
Toolbox
Adding a Material
01 Tool Steel Properties
Assemblies and Subassemblies
Assembly/Subassembly Creation
Hole Series
Adding Toolbox Components
Edit Toolbox Component
Exploded Views
Animating Your Explosion
Motion Study
Chapter 11: Bar Puller—Drawings
Break in View
Crop View
Hole Callout
Ordinate Dimensioning
Hole Tables
Chapter 12: Centering Jigs—Parts
Handle Grip
Cosmetic Thread
Handle
Creating a Basic Loft
Hole Wizard
Adding Raised Text
Adding an Appearance
Bushings
Screw
Sweep Cut Thread
Revolve Cut
Spring
Swept Boss
Extruded Cut with a Line
Base
Center Block
Derived Part
Left Jaw
Right Jaw—Derived Part
Edit in Context
Name Plate
Wrap
Scale
Chapter 13: Centering Jig—Assembly
Screw Subassembly
Assembly Configurations
Cavity
Main Assembly
Flexible Subassembly
Hole Series
Global Variable Creation
In-Context Parts
Face Fillet
Assembly Configurations
Chapter 14: Turkey Call
Creating the Revolved Part
Inserting the Sketch Picture and Creating the Spline
Creating the Spline
New View Orientation
Editing the Spline
Creating Work Planes
Repairing Sketch Errors
Deleting a Face
Appendixes
Appendix 1: Constraints/Relationships
Appendix 2: Dimension Tolerance Types
Appendix 3: Short Cuts
Appendix 4: Built-In Calculator
Appendix 5: New Features of SolidWorks 2015
Index
* توجه: کاربران نگران زبان انگلیسی کتاب نباشند. حتی کاربرانی که سر انگشتی زبان انگلیسی یاد دارند قادر خواهند بود از این کتاب بهره کافی را ببرند. لازم به ذکر است که آموزش سالیدورکس با رویکرد مبتنی بر پروژه (SolidWorks A Project Based Approach) در این کتاب به صورت قدم به قدم (Step to Step) همراه با تصاویر واضح و رنگی می باشد.
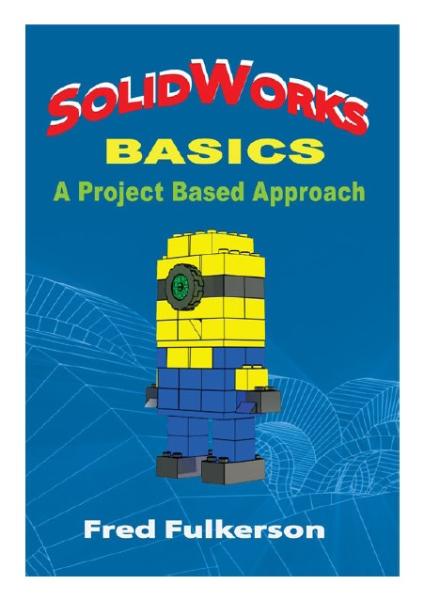
جهت دانلود کتاب آموزش سالیدورکس با رویکرد مبتنی بر پروژه (SolidWorks A Project Based Approach) برلینک زیر کلیک نمایید:
کتاب آموزش سالیدورکس با رویکرد مبتنی بر پروژه (SolidWorks A Project Based Approach)
آموزش سالیدورکس، کتاب یادگیری به همراه تمرین SolidWorks 2016 , Learn by doing-Part 2
نرم افزار SolidWorks 2016 با توانمندی های جدید از جمله رزوه سه بعدی، ایجاد فنر اتوماتیک، سوییپ دوطرفه، انتخاب متریال حرفه ای و ... محیطی بسیار جذاب و کاربرپسند را برای طراحان و کاربران سالیدورکس فراهم نموده است.
کتاب یادگیری به همراه تمرین SolidWorks 2016 , Learn by doing-Part 2، یکی از کتاب های مرجع، مفید و کاربردی در زمینه آموزش طراحی با نرم افزار سالیدورکس 2016 می باشد. مطالب و سرفصل های این کتاب در ادامه مطالب جلد 1 می باشد این کتاب مشتمل بر 112 صفحه، به زبان انگلیسی روان، تایپ شده، به همراه کلی تصاویر رنگی، با فرمت PDF، به ترتیب زیر گردآوری شده است:
Chapter 1: Surface Design
TUTORIAL 1 - Extruded Surfaces
TUTORIAL 2 - Revolved Surfaces
TUTORIAL 3 - Swept Surfaces
TUTORIAL 4 - Lofted Surfaces
TUTORIAL 5 - Planar Surfaces
TUTORIAL 6 - Creating a Ruled Surface using the Tangent to Surface option
TUTORIAL 7 - Creating a Ruled Surface using the Normal to Surface option
TUTORIAL 8 - Creating a Ruled Surface using the Tapered to Vector option
TUTORIAL 9 - Creating a Ruled Surface using the Perpendicular to Vector option
TUTORIAL 10 - Creating a Ruled Surface using the Sweep option
TUTORIAL 11 - Offset Surface
TUTORIAL 12 - Knitting Surfaces
Creating a Solid by Knitting Surfaces
TUTORIAL 13 - Trimming Surfaces
Trimming a Surface using the Standard option
Trimming Surfaces using the Mutual option
TUTORIAL 14 - Extending Surfaces
TUTORIAL 15 - Untrimming a Surface
TUTORIAL 16 - Deleting Holes
TUTORIAL 17 - Filled Surface
TUTORIAL 18
TUTORIAL 19 - Converting a Surface to Solid
TUTORIAL 20 - Thickening the Surface
TUTORIAL 21 - Deleting Faces
TUTORIAL 22 - Replacing Faces
TUTORIAL 23 - Cutting with Surfaces
TUTORIAL 24 - Thickened Cut
TUTORIAL 25 - Freeform Surfaces
TUTORIAL 26 - Boundary Surfaces
TUTORIAL 27 - Flatten Surface
Chapter 2: Mold Tool
TUTORIAL 1
Performing Draft Analysis
Applying Shrinkage allowance
Inserting Mold Folders
Creating a Parting Line
Creating Shut-off Surfaces
Creating Parting Surfaces
Creating the Tooling Split
Performing the Undercut analysis
Creating side cores
Creating your own surfaces
Chapter 3: Weldments
TUTORIAL 1
TUTORIAL 2
Adding Structural members
Trimming the Structural Members
Creating Gussets
Creating Base Plates
Mirroring Gussets and Base plates
Creating Fillet Beads
Creating Weld Beads
TUTORIAL 3 - Creating End Caps
TUTORIAL 4 - Working with Cut lists
Adding Cut list to the Weldment Drawing
Adding Columns to the Cut list table
Creating Bounding box
Adding a Weld table to the Weldment Drawing
Adding a Weld Symbols
Creating Sub Weldments
TUTORIAL 5 - Creating Custom Profiles for structural members
* توجه: کاربران نگران زبان انگلیسی کتاب نباشند. حتی کاربرانی که سر انگشتی زبان انگلیسی یاد دارند قادر خواهند بود از این کتاب بهره کافی را ببرند. لازم به ذکر است که یادگیری به همراه تمرین SolidWorks 2016 , Learn by doing-Part 2 در این کتاب به صورت قدم به قدم (Step to Step) همراه با تصاویر واضح و رنگی می باشد.
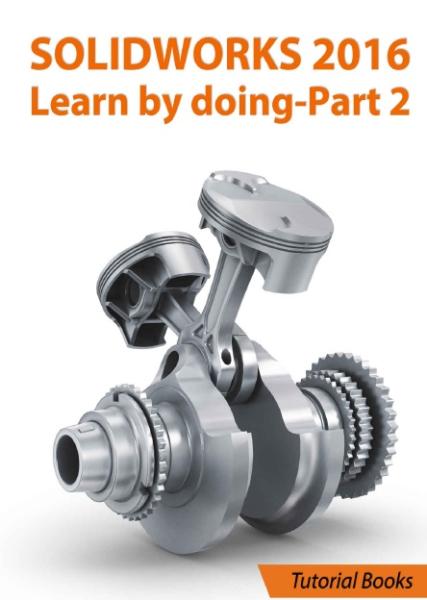
جهت دانلود کتاب یادگیری به همراه تمرین SolidWorks 2016 , Learn by doing-Part 2 بر لینک زیر کلیک نمایید:
آموزش سالیدورکس، کتاب یادگیری به همراه تمرین SolidWorks 2016 , Learn by doing-Part 2
آموزش سالیدورکس، کتاب یادگیری به همراه تمرین SolidWorks 2016 , Learn by doing-Part 1
نسخه 2016 SolidWorks شاهد تغییرات عمده ای بوده و همچنین شاهد این هستیم که بهبودهای متعددی جهت سهولت کار با این نرم افزار صورت گرفته است. گوشه ای از توانمندی های نرم افزار SolidWorks 2016 به شرح زیر می باشد:
*** در این نسخه از نرم افزار امکان باز کردن فایلهای STL پیچیده تر نسبت به گذشته با گزینه Solid و Surface وجود دارد (تا 500000 facets).
*** توسط دستور PhotoView 360 Scene Illumination Proof Sheet هنگام رندرینگ می توان در یک نگاه تاثیر تغییرات مختلف نور در محیط را بر رندرینگ نهایی دید و با استناد به آن عددهای درست برای تنظیم نور را انتخاب نمود.
*** در SolidWorks 2016 امکان منحنی C2 به Edge Fillet افزوده شده است. در نسخه قبلی این امکان تنها برای Face Fillet وجود داشت.
*** هم اکنون می توانید در هر نقطه ای از سطح یک صفحه مرجع موازی با نمای دید بسازید. برای این کار تنها لازم است در هر نقطه از سطح کلیک راست و گزینه Create Plane Parallel to screen را انتخاب نمایید.
*** در محل انتخاب شده یک 3D Sketch Point و یک Plane ایجاد می شود. می توانید 3D Sketch Point را نسبت به قطعه اندازه گذاری نمایید.
*** با استفاده از گزینه Circular Profile دیگر نیازی به رسم Sketch برای مقطع دایروی نبوده و تنها با انتخاب یک Edge از قطعه و تعیین قطر می توان Sweep را ایجاد نمود.
*** با استفاده از گزینه Equal Curve می توان طول یک خط و یا دایره در Sketch را برابر طول یک منحنی تعریف کرد.
*** بالاخره قابلیت Instant 3D به محیط Sketch وارد شد. اکنون با استفاده از Instant 2D می توانید ابعاد مورد نظر را با حرکت پوینتر ماوس تغییر دهید.

کتاب یادگیری به همراه تمرین SolidWorks 2016 , Learn by doing-Part 1، یکی از کتاب های مرجع، مفید و کاربردی در زمینه آموزش طراحی با نرم افزار سالیدورکس 2016 می باشد. این کتاب مشتمل بر 278 صفحه، به زبان انگلیسی روان، تایپ شده، به همراه کلی تصاویر رنگی، با فرمت PDF، به ترتیب زیر گردآوری شده است:
Chapter 1: Getting Started
Starting SolidWorks
User Interface
Quick Access Toolbar
Menu
Command Manager
Features tab
Evaluate tab
Sketch tab
Assemble tab
Drawing Environment tabs
Sheet Metal tab
Feature Manager Design Tree
Status bar
View (Heads Up) Toolbar
Shortcut Menus
Property Manager
Breadcrumbs
Mouse Functions
Customizing the Command Manager, Shortcut Bars, and Menus
Chapter 2: Modeling Basics
TUTORIAL 1
Opening a New Part File
Starting a Sketch
Adding Dimensions
Constructing the Base Feature
Adding an Extruded Feature
Adding another Extruded Feature
Saving the Part
TUTORIAL 2
Opening a New Part File
Sketching a Revolve Profile
Constructing the Revolved Boss
Constructing the Cut feature
Constructing another Cut feature
Adding a Fillet
Saving the Part
TUTORIAL 3
Opening a New Part File
Constructing the Cylindrical Feature
Constructing Cut feature
Saving the Part
TUTORIAL 4
Applying Draft
Saving the Part
Chapter 3: Assembly Basics
TUTORIAL 1
Opening a New Assembly File
Inserting the Base Component
Adding the second component
Applying Mates
Adding the Third Component
Checking the Interference
Saving the Assembly
Starting the Main assembly
Adding Disc to the Assembly
Placing the Sub-assembly
Adding Constraints
Placing the second instance of the Sub-assembly
Saving the Assembly
TUTORIAL 2
Creating the Exploded View
Creating Explode lines
Chapter 4: Creating Drawings
TUTORIAL 1
Opening a New Drawing File
Generating the Base View
Creating the Section View
Creating the Detailed View
Creating the Centerline
Specifying Dimension Settings
Retrieving Dimensions
Adding additional dimensions
Saving the Drawing
TUTORIAL 2
Creating a Custom Sheet Format
Starting a New drawing
Generating the Drawing Views
TUTORIAL 3
Creating the Isometric View
Generating the Exploded View
Creating the Bill of Materials
Creating Balloons
Chapter 5: Sketching
Creating Rectangles
Creating Polygons
Relations
Merge
Horizontal
Vertical
Tangent
Parallel
Perpendicular
Midpoint
Automatic Relations
Deleting Relations
Hiding Relations
Sketch Numeric Input
Replace Entity
Make Path
Path Length Dimension
Convert Entities
Midpoint line, Perimeter Circle, and Sketch Xpert
Ellipses
Partial Ellipse
Conic
Move and Rotate Entities
Rotate Entities
Copy Entities
Scale Entities
Trim Entities
Extend Entities
Offset Entities
TUTORIAL 1
Sketch Fillet
Sketch Chamfer
Mirror Entities
Stretch Entities
Circular Sketch Pattern
3D Sketch
Chapter 6: Additional Modeling Tools
TUTORIAL 1
Constructing the Helix
Adding the Reference Plane
Constructing the Sweep feature
TUTORIAL 2
Constructing a Revolved Cut
Constructing a Mirror Feature
TUTORIAL 3
Creating Sections and Guide curves
Creating another section
Constructing the swept feature
Constructing the Extruded feature
Adding Fillets
Shelling the Model
Adding the Indent feature
Adding Threads
TUTORIAL 4
Constructing a cylindrical shell
Adding a Slot
Constructing the Axis
Constructing the Linear pattern
Constructing the Circular pattern
TUTORIAL 5
Constructing the first feature
Constructing the Second Feature
Constructing the third feature
Inserting Holes
Adding Chamfers
TUTORIAL 6
Constructing the first feature
Constructing the Extruded cut
Making the Curve Driven Pattern
TUTORIAL 7
Start a new part file
Creating the second feature
Adding Cosmetic Threads
Creating Configurations Table
TUTORIAL 8
Creating the First Feature
Creating the Extruded surface
Replacing the top face of the model with the surface
Creating a Face fillet
Creating a Variable Radius fillet
Shelling the Model
Creating the Mounting Bosses
Creating the Vent Feature
Chapter 7: Sheet metal Modeling
TUTORIAL 1
Opening a New File
Constructing the Base Flange
Adding an Edge flange
Constructing the Miter Flange
Closing the Corners
Adding Corner Reliefs
Adding a Tab feature
Adding a Jog
Unfolding the bends
Creating Cuts across bends
Folding the Unfolded bends
Performing the Forming Operations
Making the Linear Pattern
Adding a Hem
Adding a vent
Adding Sheet Metal Gussets
Making a Fill Pattern
Chapter 8: Top-Down Assembly
Creating a New Assembly File
Creating a component in the Assembly
Creating the Second Component of the Assembly
Creating the third Component of the Assembly
Adding Bolt Connections to the assembly
Patterning components in an assembly
TUTORIAL 2
Creating Smart Mates
Creating the Limit Mate
Creating the Slot Mate
Chapter 9: Dimensions and Annotations
TUTORIAL 1
Creating a Model View with Center Marks
Creating Centerlines and Center Marks
Editing the Hatch Pattern
Applying Dimensions
Placing the Datum Feature
Placing the Feature Control Frame
Placing the Surface Texture Symbols
Additional Exercises
Exercise 1
Exercise 2
Exercise 3
Exercise 4
Exercise 5
Exercise 6
* توجه: کاربران نگران زبان انگلیسی کتاب نباشند. حتی کاربرانی که سر انگشتی زبان انگلیسی یاد دارند قادر خواهند بود از این کتاب بهره کافی را ببرند. لازم به ذکر است که یادگیری به همراه تمرین SolidWorks 2016 , Learn by doing-Part 1 در این کتاب به صورت قدم به قدم (Step to Step) همراه با تصاویر واضح و رنگی می باشد.

جهت دانلود کتاب یادگیری به همراه تمرین SolidWorks 2016 , Learn by doing-Part 1 برلینک زیر کلیک نمایید:
آموزش سالیدورکس، کتاب یادگیری به همراه تمرین SolidWorks 2016 , Learn by doing-Part 1